
갬미의 성장일기
Day 51 - k8s Volume, job, cron job, configmap 본문
오늘 배운 내용
- 쿠버네티스 볼륨
- 쿠버네티스 잡, 크론잡
web 서버 접근 log를 외부 nfs 서버에 마운트한다고 할때, 시간이 지날수록 log 파일은 점점 비대해질 수 밖에 없다
log가 계속 쌓이면
- nginx 접속이 느려질 수있다
- log가 너무 많아서 보기가 복잡해진다
일정 기간마다 log 를 백업하고 서버에서는 지우는 작업을 통해 log 파일이 너무 커지는것을 방지할 수 있다
쿠버네티스의 잡, 크론잡으로 이걸 구현할 수 있다
Job
https://kubernetes.io/docs/concepts/workloads/controllers/job/
Jobs
A Job creates one or more Pods and will continue to retry execution of the Pods until a specified number of them successfully terminate. As pods successfully complete, the Job tracks the successful completions. When a specified number of successful complet
kubernetes.io
Job은 어떤일을 한번 실행하기 위한 pod 생성하는 작업이다
= 일회성 pod 생성
sample-job.yml
apiVersion: batch/v1
kind: Job
metadata:
  name: pi
spec:
  template:
    spec:
      containers:
      - name: pi
        image: perl
        command: ["perl",  "-Mbignum=bpi", "-wle", "print bpi(2000)"]
      restartPolicy: Never
  backoffLimit: 4
-w 모드로 pod변화를 확인했을때 1회 실행 후 completed 상태로 변화하고 이는 pod가 1번 일을 수행하고 역할을 다했음을 의미한다
실행 사항을 보고싶을때는 pod의 log를 확인하면 된다
kubectl logs [파드 이름]
Job 실습
nginx log를 백업하기 위한 job pod를 만들고싶다
1. nfs 서버를 만든다 (gcp vm 사용)
2. nginx 서버를 만든다 (Deployment , replicas = 10) -> 몇번 접속하여 access.log를 만든다
3. job pod에 사용할 docker image만들기
- log파일을 백업하고, 안의 내용을 지우는 명령어를 포함한 dockerfile 생성
4. job.yaml 작성
apiVersion: batch/v1
kind: Job
metadata:
  name: backup
spec:
  template:
    spec:
      containers:
      - name: centos
        image: gymin97/msa2:jobsh_v1
        imagePullPolicy: Always
        command: ["/test/copy.sh"]
        volumeMounts:
          - name: log
            mountPath: /var/log/nginx
      volumes:
        - name: log
          nfs:
            server: 10.128.0.54
            path: /log
      restartPolicy: Never
  backoffLimit: 4
실행
실행하고나면 실행 직후 pod 상태는 complate로 바뀌고

nfs 서버에는 bacup log가 생긴다

이전에 기록되어 있던 log가 backup에 남는다
cronjob
job을 일정 기간동안 반복적으로 하는 것
sample.yml - 현재 시간과 hello 메시지를 1분마다 출력
apiVersion: batch/v1
kind: CronJob
metadata:
  name: hello
spec:
  schedule: "*/1 * * * *" # 분, 시, 일, 월, 요일
  jobTemplate:
    spec:
      template:
        spec:
          containers:
          - name: hello
            image: busybox
            imagePullPolicy: IfNotPresent
            command:
            - /bin/sh
            - -c
            - date; echo Hello from the Kubernetes cluster
          restartPolicy: OnFailure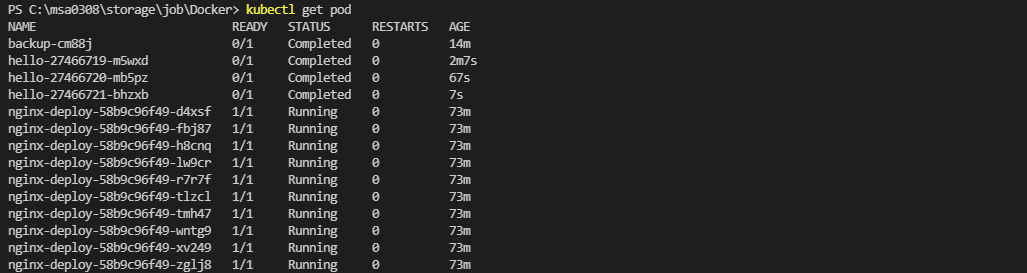
1분마다 job pod 생성
크론잡 실습
1분에 한번씩 log backup하는 cronjob만들기
apiVersion: batch/v1
kind: CronJob
metadata:
  name: backup-cron
spec:
  schedule: "*/1 * * * *" # 분, 시, 일, 월, 요일
  jobTemplate:
    spec:
      template:
        spec:
          containers:
          - name: centos
            image: gymin97/msa2:jobsh_v1
            imagePullPolicy: Always
            command: ["/test/copy.sh"]
            volumeMounts:
              - name: log
                mountPath: /var/log/nginx
          volumes:
            - name: log
              nfs:
                path: /log
                server: 10.128.0.54
          restartPolicy: OnFailure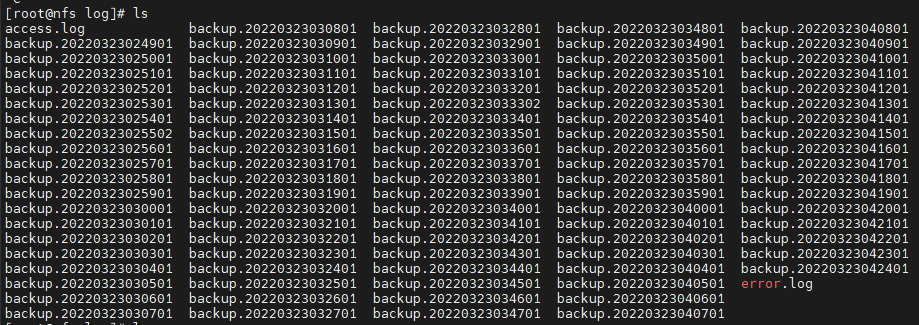
Configmap
ConfigMaps
A ConfigMap is an API object used to store non-confidential data in key-value pairs. Pods can consume ConfigMaps as environment variables, command-line arguments, or as configuration files in a volume. A ConfigMap allows you to decouple environment-specifi
kubernetes.io
conf를 바꾸고자 할때
1. 이미지로 만들어 변경할때 마다 새로 build
2. 외부 볼륨과 마운트
2번이 더 편하지만 conf파일이 한두개가 아닌데 모두 다 외부 볼륨에 마운트해서 사용해야 하나?
외부 볼륨을 사용하지 않고 conf를 설정하는 기능을 제공한다
= ConfigMaps
configmap = k8s에서 제공하는 특별한 형태의 볼륨이다
가장 큰 메리트는 conf파일에 대한 외부볼륨 고민을 하지 않아도 되는것이다
nginx의 conf 파일을 configmap으로 생성하여 html화면을 변경해보자
1. dockerfile build
FROM nginx

COPY ./index.html /usr/share/nginx/html/web1/index.html
COPY ./index2.html /usr/share/nginx/html/web2/index.html
COPY ./index3.html /usr/share/nginx/html/web3/index.html
2. configmap으로 nginx default.conf 생성하기
apiVersion: v1
kind: ConfigMap
metadata:
  name: nginx-conf
data:
  nginx.conf: |
    user nginx;
    worker_processes auto;
    error_log /var/log/nginx/error.log;
    pid /run/nginx.pid;

    # Load dynamic modules. See /usr/share/nginx/README.dynamic.
    include /usr/share/nginx/modules/*.conf;

    events {
        worker_connections 1024;
    }

    http {
        log_format  main  '$remote_addr - $remote_user [$time_local] "$request" '
                          '$status $body_bytes_sent "$http_referer" '
                          '"$http_user_agent" "$http_x_forwarded_for"';

        access_log  /var/log/nginx/access.log  main;

        sendfile            on;
        tcp_nopush          on;
        tcp_nodelay         on;
        keepalive_timeout   65;
        types_hash_max_size 2048;

        default_type        application/octet-stream;

        # Load modular configuration files from the /etc/nginx/conf.d directory.
        # See http://nginx.org/en/docs/ngx_core_module.html#include
        # for more information.
        include /etc/nginx/conf.d/*.conf;

        server {
            listen       80 default_server;
            listen       [::]:80 default_server;
            server_name  _;
            # html 경로 이 곳을 수정
            root         /usr/share/nginx/html/web1;

            # Load configuration files for the default server block.
            include /etc/nginx/default.d/*.conf;

            location / {
            }

            error_page 404 /404.html;
                location = /40x.html {
            }

            error_page 500 502 503 504 /50x.html;
                location = /50x.html {
            }
        }
    }
3. deployment.yml
apiVersion: apps/v1
kind: Deployment
metadata:
  name: nginx-deploy
spec:
  replicas: 5
  selector:
    matchLabels:
      app: nginx
  template:
    metadata:
      labels:
        app: nginx
    spec:
      containers:
      - name: nginx
        image: gymin97/msa2:configmap_nginx_1
        # nginx 컨테이너의 마운트 위치를 지정
        volumeMounts:
          - mountPath: /etc/nginx
            name: nginx-conf
        ports:
        - containerPort: 80
      volumes:
      - name: nginx-conf
       # config map의 이름을 적는다
        configMap:
          name: nginx-conf
configmap 자체가 외부저장소이다
수정하려면 configmap.yml을 수정+apply하고 deployment도 apply 한다 (nginx가 재실행되며 적용되기 때문)


config file로 configmap 만들기
생으로(?) configmap.yml을 적는건 쉽지 않은 일이다
k8s는 사용자가 conf 파일을 가지고 있다면 이를 가지고 configmap.yml을 만들 수 있는 기능을 제공한다
Configure a Pod to Use a ConfigMap
Many applications rely on configuration which is used during either application initialization or runtime. Most of the times there is a requirement to adjust values assigned to configuration parameters. ConfigMaps is the kubernetes way to inject applicatio
kubernetes.io
1. conf파일로 바로 configmap 실행하기
kubectl create configmap was-conf --from-file=./config-map/was.conf
2. conf파일로 바로 configmap 실행 + configmap.yml 을 파일로 만들기
kubectl create configmap was-conf --from-file=./config-map/was.conf -o yaml --dry-run > was-conf.yml만들어진 yml 파일
apiVersion: v1
data:
  was.conf: "upstream was {\r\n    server mywas:8080;\r\n}\r\n\r\nserver {\r\n    listen
    80;\r\n    server_name mynginx;\r\n    access_log /var/log/nginx/access.log;\r\n\r\nlocation
    / {\r\n\r\n        #root /usr/share/nginx/html;\r\n        index index.html index.htm
    index.jsp;\r\n        proxy_pass http://was;\r\n    }\r\n\r\n    location ~ \\.(css|js|jpg|jpeg|gif|htm|html|swf)$
    {\r\n        root /usr/share/nginx/html;\r\n        index index.html index.htm;\r\n
    \   }\r\n\r\n    location ~ \\.(jsp|do)$ {\r\n    index index.jsp;\r\n        proxy_pass
    http://was;\r\n   \r\n    proxy_redirect off;\r\n    charset utf-8;\r\n    }\r\n\r\n
    \   error_page 500 502 503 504 /50x.html;\r\n    location = /50x.html {\r\n        root
    /usr/share/nginx/html;\r\n    }\r\n}"
kind: ConfigMap
metadata:
  creationTimestamp: null
name: was-confyamllint를 통해 개행문자가 정리된 yml을 만들수있다
YAMLlint - The YAML Validator
YAML Lint Paste in your YAML and click "Go" - we'll tell you if it's valid or not, and give you a nice clean UTF-8 version of it. Optimized for Ruby.
www.yamllint.com
---
apiVersion: v1
data:
  was.conf: |-
      upstream was {
          server mywas:8080;
      }

      server {
          listen 80;
          server_name mynginx;
          access_log /var/log/nginx/access.log;

      location / {

              #root /usr/share/nginx/html;
              index index.html index.htm index.jsp;
              proxy_pass http://was;
          }

          location ~ \.(css|js|jpg|jpeg|gif|htm|html|swf)$ {
              root /usr/share/nginx/html;
              index index.html index.htm;
          }

          location ~ \.(jsp|do)$ {
          index index.jsp;
              proxy_pass http://was;

          proxy_redirect off;
          charset utf-8;
          }

          error_page 500 502 503 504 /50x.html;
          location = /50x.html {
              root /usr/share/nginx/html;
          }
      }
kind: ConfigMap
metadata:
  creationTimestamp: ~
  name: was-conf
미니과제
|
configmap을 이용하여 3tier 구성하기
조건
1. nginx.conf는 configmap을 이용한다
2. access log는 nfs에 남긴다
3. replicas
- nginx = 3
- was = 3
- DB = 1
|
실행 방법
1. was.conf로 configmap.yml 만들고 실행하기
2. nfs 서버 만들기
3. DB, was, nginx yml 만들고 실행하기
+ DB 한글 지원하게 하기
1. was.conf로 was-configmap.yml 만들고 실행하기
1-2. mysql.conf로 koreandDB-configmap.yml 만들고 실행하기
2. nfs 서버 만들기
3. DB, was, nginx yml 만들고 실행하기

eks로도 해보기
1. was.conf로 was-configmap.yml 만들고 실행하기
1-2. mysql.conf로 koreandDB-configmap.yml 만들고 실행하기
2. nfs 서버 만들기
3. DB, was, nginx yml 만들고 실행하기
-> 이때 nginx 에서 nfs 마운트를 해제해야한다 (nfs서버가 gcp의 vm을 사설 ip로 사용하기 때문)

오늘의 회고
- 미니과제에 인그레스도 추가해보라고하셨는데 자꾸 연결이 뻑나서 안들어가졌다 .. 생성되는게 오래걸려서 그런가보다했는데 아닌것같다 ㅎ
- 실습할때마자 진이 빠지지만 그래도 한번씩 생각해보면서 실습 할 수있어 좋은것 같다
- 이제 쿠버네티스 과정이 거의 끝나가는데 너무너무 유용해서 실습 과제를 위주로 잘 정리를 해놔야겠다
'Cloud > Cloud 공부일기' 카테고리의 다른 글
| Day 53 - Bastion host, BGP, VPN (0) | 2022.03.25 |
|---|---|
| Day 52 - k8s secret, k8s PV, PVC (0) | 2022.03.24 |
| Day 50 - k8s DaemonSet, k8s Volume (0) | 2022.03.22 |
| Day 49 - k8s 인그레스 구글 인증서 사용하기, k8s LB 알고리즘, k8s deployment (0) | 2022.03.21 |
| Day 48 - 쿠버네티스 인그레스 TLS , 쿠버네티스 3tier 구성하기 (0) | 2022.03.18 |


